The Dremel drill bits from Amazon arrived. They come in a packet of 4 and are 1/32". Man, are they small! They fit in the Dremel chuck nicely, but it took a bit of fiddling to get them in straight. The problem with the Dremel is that the hold button needs to be depressed as you tighten. The whole operation would be a lot easier with three hands. I used my trusty Dremel drill press and banged out the holes. It was very easy. I took my time. The copper around the holes actually nudge the bit where it needs to go. The Dremel was set to 15,000 RPMs. The bit dwells a bit at the top of the cut, then a smooth plunge finishes off each hole. Here's the result:
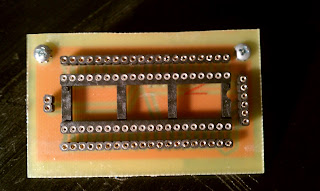
Soldering was very different from either a proto-board or a professional PCB. The solder and heat want to go everywhere. The ground plane was particularly a problem. I have to admit, I rushed the soldering. I was so excited that everything looked good. I just wanted to see the board done. Here's the top with the pins and sockets added:
Here's a picture of the bottom solder that's as bad as the soldering job:
I printed out a pin "cheat sheet" for the microcontroller in lieu of a stencil:
Now, to test it out with a hello world style blinking LED!


No comments:
Post a Comment